It is measured in milliseconds (ms) and the lower it is, the less lag you are likely to face. This is because low ping will ultimately end up taking less time in fetching data from the servers and bringing it back to your device. On the other hand, in case of high ping, the time taken for a round trip will be significantly higher and hence your device will receive data packets after an extended time frame. In the case of online multiplayer games where each second matters, this short delay could spell trouble for the end-users. So is there any way out? Well, there do exist quite a few methods through which you fix the high ping issue on your Windows 11 PC. And in this guide, we will make you aware of just that. Follow along,
How to Fix High Ping Issues in Windows 11
It is recommended that you try out each of the below-mentioned workarounds and then see which one spells out success for you. So with that in mind, let’s get started.
FIX 1: Try Network Tweaks
It goes without saying that one of the biggest culprits of high pings results from the slower network connection speed. Therefore, to resolve it, you could try a couple of network-related tweaks, namely-
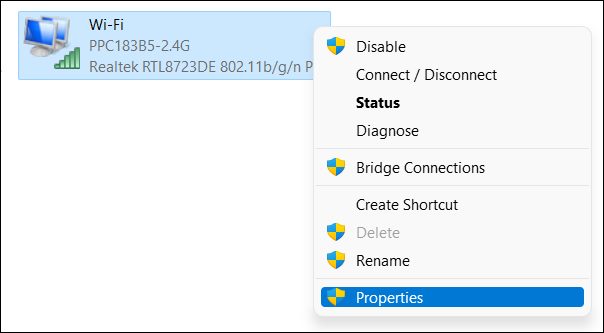
First off, try switching from the wireless mode [WiFi] to wired [ethernet].However, if a wired connection isn’t possible, then make sure to be on the 5Ghz [802.11 a/c] wireless spectrum as opposed to 2.4Ghz [802.11 b/g/n].
FIX 2: Minimize Background Network Processes
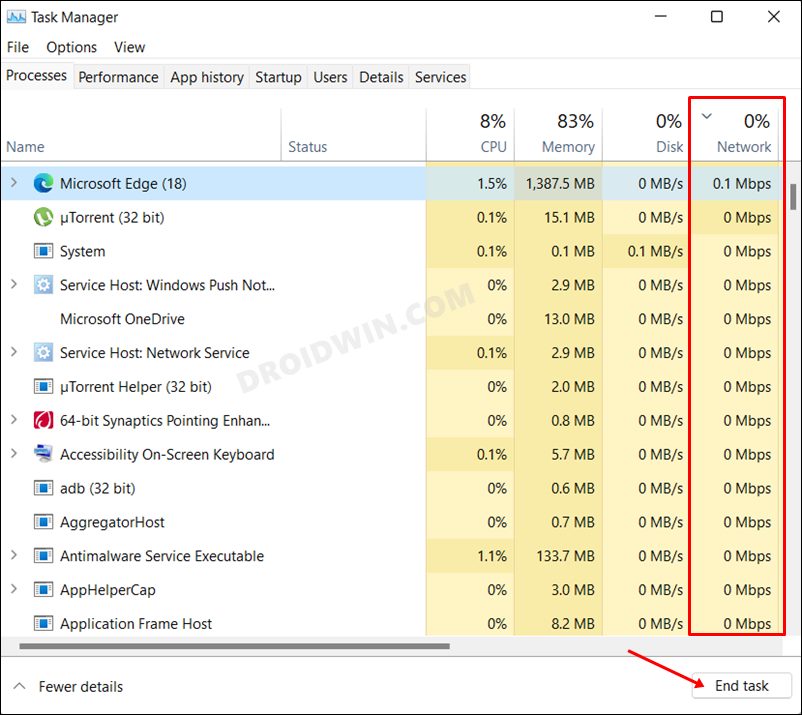
There could be a few processes running in the background that is taking up a substantial amount of the network. Out of them, some of them might not be even needed as of now. So you could disable those services which would end up freeing some network bandwidth that could be sued by the game/app that actually needs it.
FIX 3: Enable IPv6
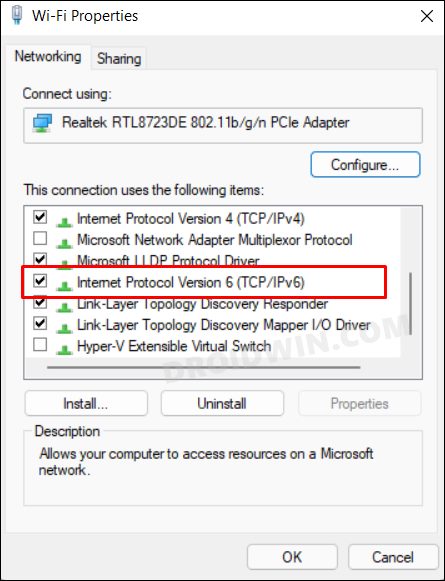
As of now, you might be using the fourth version of Internet Protocol [IPv4]. However, the IPv6 is the newer protocol and it utilizes a 128-bit IP address, as opposed to 32-bit for its counterpart. This automatically translates to a slew of additional goodies, all of which when combined could spell out a lower ping for your setup. Therefore you should consider switching from IPv4 to IPv6, using the instructions given below-
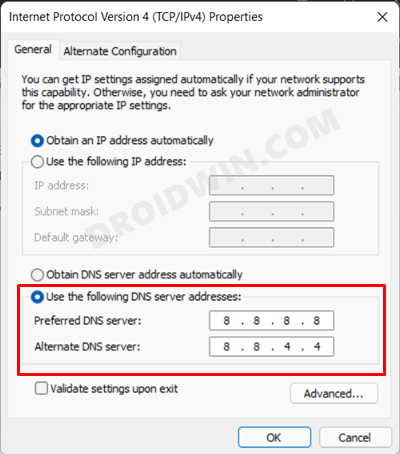
FIX 4: Change DNS Address
Your Internet Service Provider would have automatically assigned a Domain Name Server to your system. However, that isn’t the only available DNS, you could also choose from third-party DNS such as the ones from Google and Cloudflare. Apart from providing a more secure data exchange platform, they are also more efficient in getting the job done. So let’s opt for either of these two DNS and then verify if it spells out success in lowering the ping.
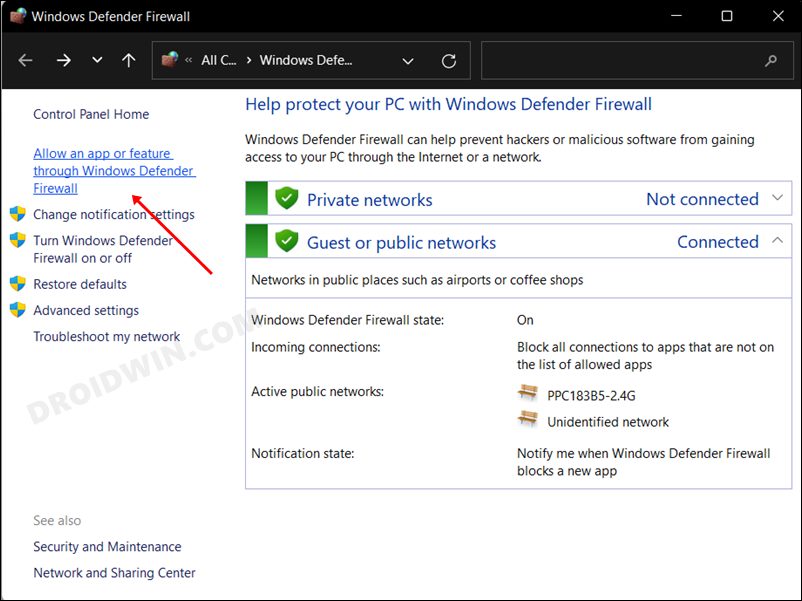
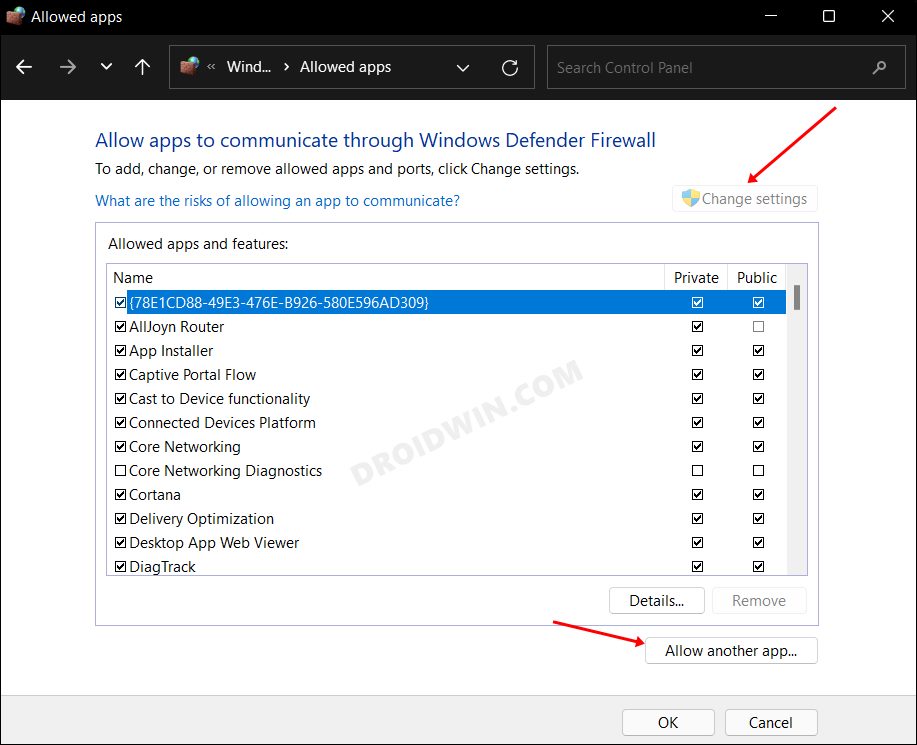
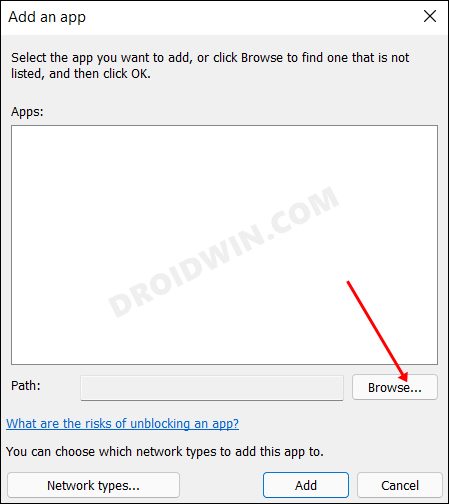
FIX 5: Add Game to Firewall Whitelist
In some instances, the Windows Firewall might raise a false positive and ends up blocking or reducing the geniune data exchanges taking place between your PC and the concerned app. So to mitigate this false alarm and avoid that from happening in the near future as well, you could add the game to the Firewall’s whitelist. Here’s how-
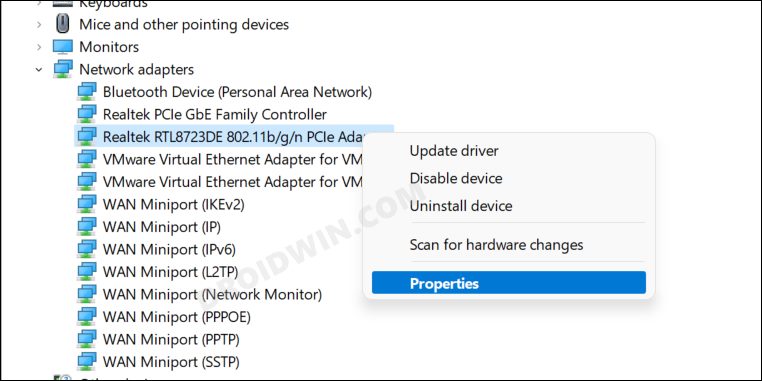
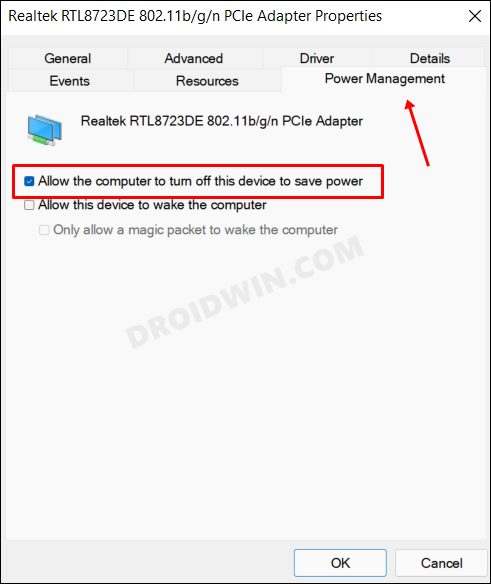
FIX 6: Disable All Battery Saver Modes
If you have put any battery restrictive measures in place, then it might create a few roadblocks in the data exchange process. Therefore, you should consider disabling all such measures, including the ones that we have listed below.
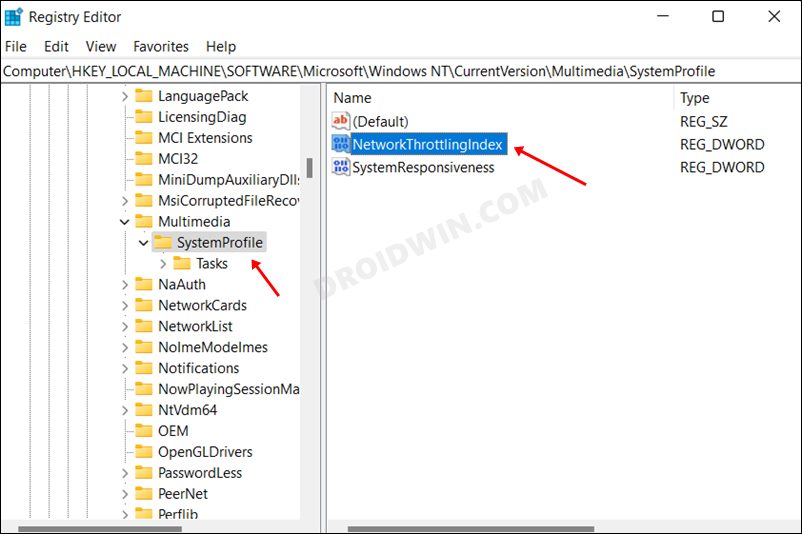
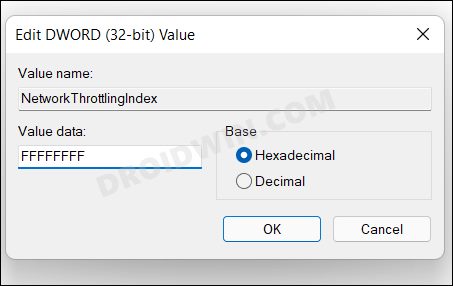
FIX 7: Using Registry Editor
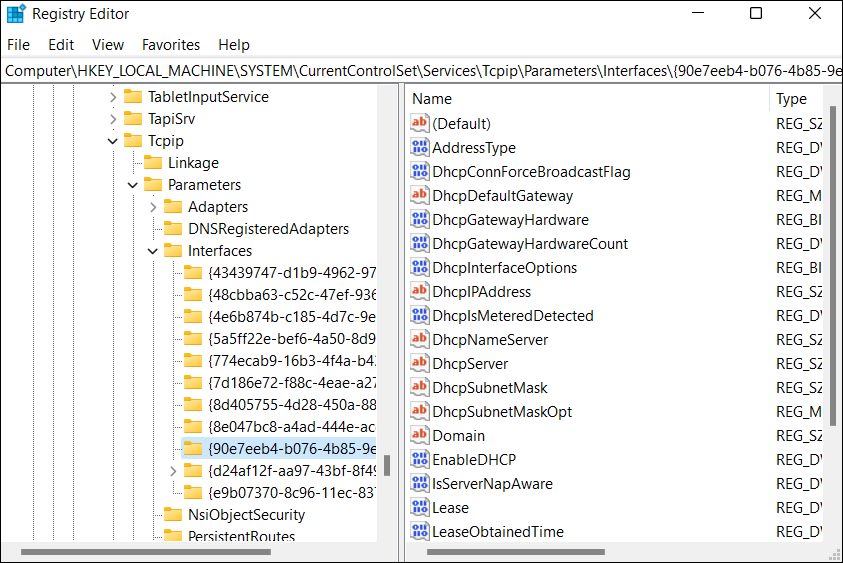
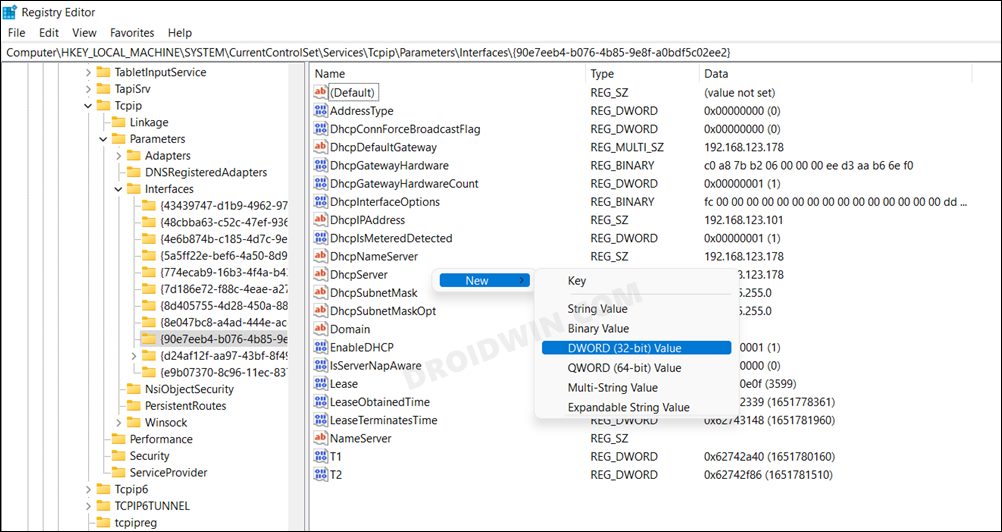
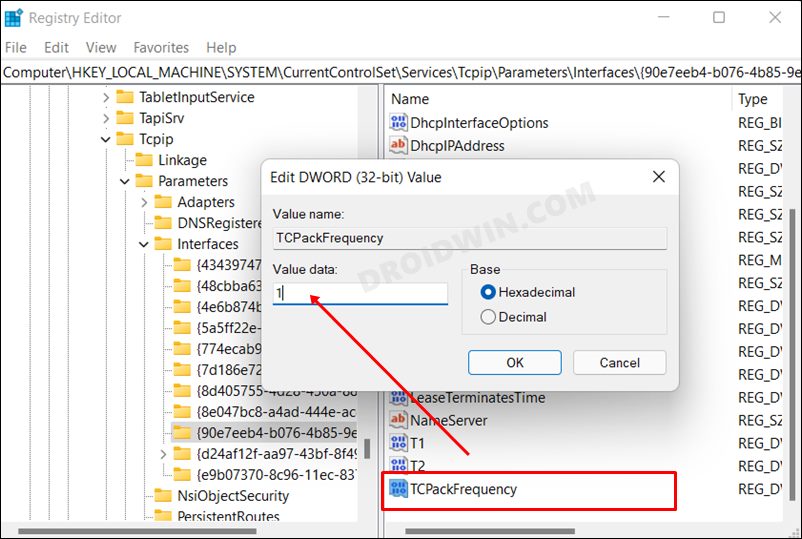
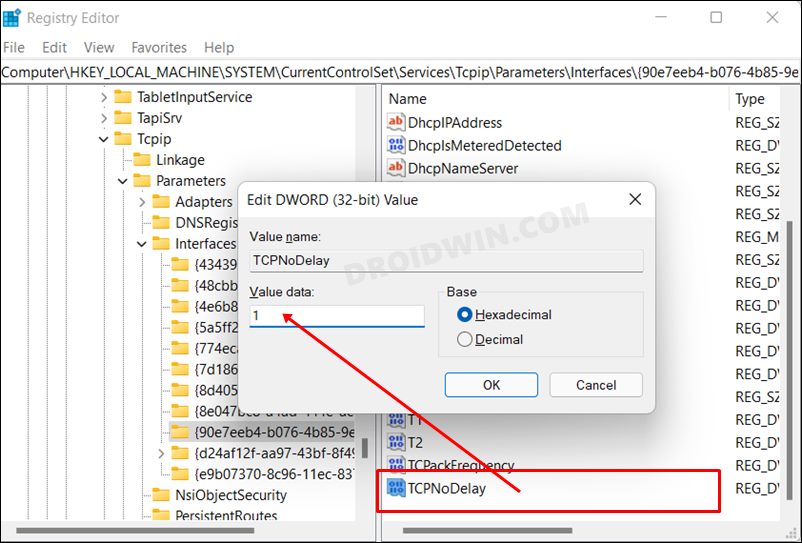
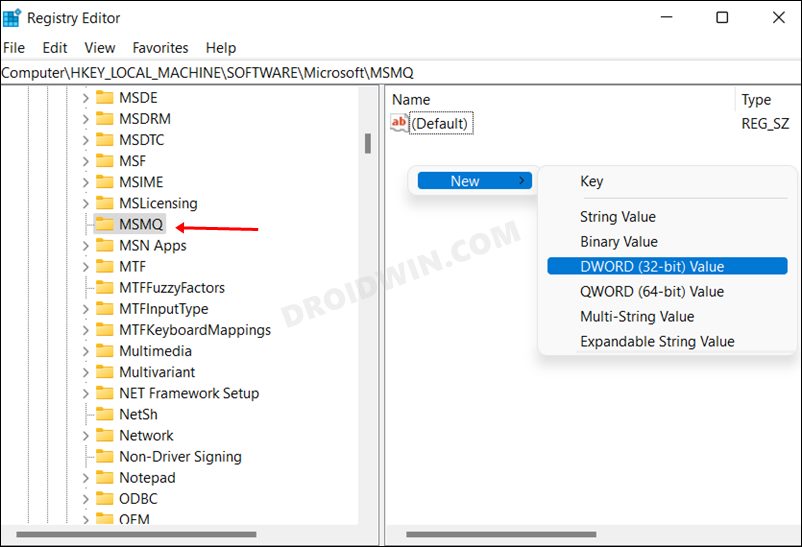
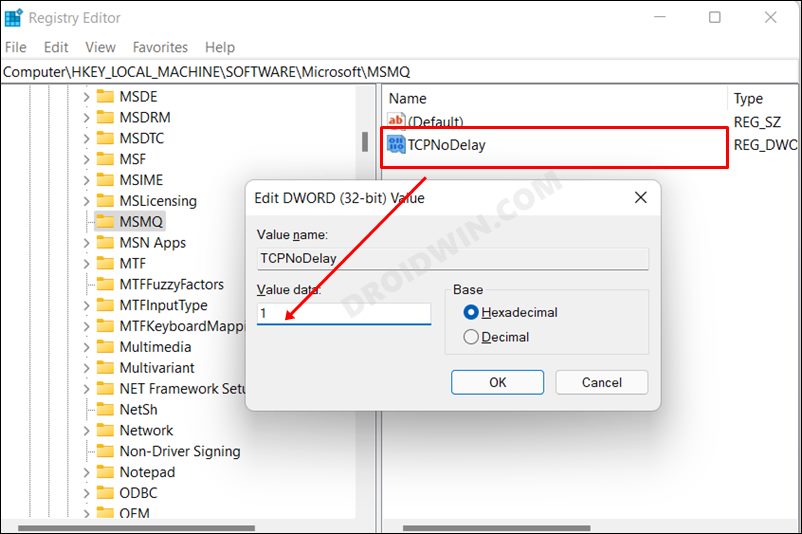
A slightly technical fix, it involves tweaking the NetworkThrottlingIndex registry value such that the OS uses the recommended threshold level for Network Throttling. Likewise, a few tweaks will also have to be made to the TCPackFrequency and the TCPNoDelay registries. But before trying it out using the below-given instructions, make sure to take a backup of the registry.
FIX 8: Reset Network
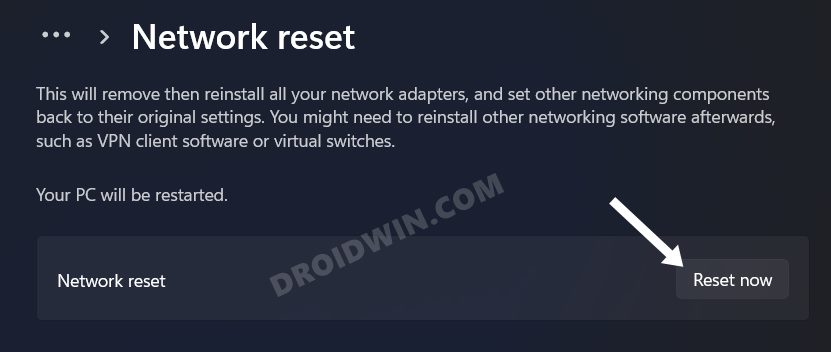
If none of the aforementioned methods worked out in your favor, then your last course of action should be to reset the network settings on your PC. This will refresh the underlying network configuration and the OS will set them up from scratch after the reset is complete. However, do note that this process will also remove all the saved networks from your PC, so make sure to save them beforehand or sync them with your account. That’s it. These were the eight different methods to fix the high ping issue on your Windows 11 PC. Do let us know which one spelled out success for you. If you have any queries concerning the aforementioned steps, do let us know in the comments. We will get back to you with a solution at the earliest.
How to Change Network Priority in Windows 11Windows could not automatically detect this network’s proxy settings [Fix]How to Find Other Computers on My Network in Windows 11How to Enable or Disable Network Adapters in Windows 11
About Chief Editor
