Once you do so, you will be in a position to welcome a plentitude of customizations onto your device. These include the likes of flashing a custom recovery such as TWRP or OrangeFox, getting access to the system partition via Magisk, and flashing tons of mods such as Substratum Themes, Magisk Modules, Xposed Framework, and the likes. Along the same lines, you could also flash a customized build of the Android OS that offers a bunch of additional features and a few extra years of OS upgrade. Yes, you guessed it right, we are talking about Custom ROMs! And in this guide, we will make you aware of the instructions to install the LineageOS 18.1 based on Android 11 onto your device. So without further ado, let’s get started.
What is LineageOS?
LineageOS is among the most popular custom ROMs for tech enthusiasts. Earlier known as CyanogenMod, this ROM has always managed to maintain a rich equilibrium when it comes to device-stability and feature sets. While you wouldn’t be getting a plethora of features baked into your device, but they have made sure to ship in all the required ones. Along with that, there are a few LineageOS exclusive features that you might come across as well. Not to mention the fact that many other custom ROMs have sources directly based on the Lineage itself. So it proves to be a breeding ground for the tech community. Another thing that we love about this ROM is the fact that it offers OS upgrades even years after the OEM stops the official updates. Even the Samsung Galaxy S4, whose last major update was Android 5.0.1 Lollipop has been blessed with Android 11 courtesy of this ROM! So with this, you would have got a perfect idea about this ROM and the goodies that it has to offer. Let’s now check out the installation instructions to install the latest LineageOS 18.1 based on Android 11 onto your device.
How to Install LineageOS 18.1 Android 11 on any Device
Before we begin with the instructions, there are a few things to be kept in mind. First and foremost, “no two devices are created equally”. So there would be some devices that might follow a slightly different pattern than what the convention has to say. While we would try our best to list out all such exceptions, but owing to the hundreds of devices running the LineageOS, it’s not possible to include all the exceptions for all the devices. With that said, the below instructions will still be able to cover most of the devices and most of our readers shouldn’t have any issues such as well. However, if you wish to be double sure, you may also have a go through of your device’s page at XDA Developers. Keeping all these points in mind, let’s get started with the steps to install the LineageOS 18.1 based on Android 11 onto your device. Droidwin and its members wouldn’t be held responsible in case of a thermonuclear war, your alarm doesn’t wake you up, or if anything happens to your device and data by performing the below steps.
Fix TWRP Error 20 GApps after flashing LineageOSHow to Replace LineageOS Recovery with TWRPHow to Fix TWRP Error 70 [With Screenshots]
Take a Complete Device Backup
Before going any step further, you will have to take a complete device backup of all the data on your device. This is because to avoid any encryption issues, we will be wiping the data partition, hence data is a must (Nandroid Backup via TWRP is recommended).
Download Official LineageOS 18.1 Android 11
Get hold of your device ROM from the below table. Do keep in mind that these are only the official builds. If your device is not part of this list, then it might be supporting the unofficial builds as of now. You may get them from the device section of XDA. The flashing instructions are the same for both the official and unofficial versions unless stated otherwise.
Download GApps [Optional]
LineageOS doesn’t ship with Google Apps, Services, and Frameworks. So if you wish to have Google Apps installed on your device, you would need to flash the GApps via TWRP.Download GApps (Google Apps) for Android 11 (as for LineageOS, it is recommended to go ahead with MindTheGApps). Do keep in mind that it is completely optional and if you wish to live a De-Googled Life, then it’s better to stay away from GApps.
Download Magisk [Optional]
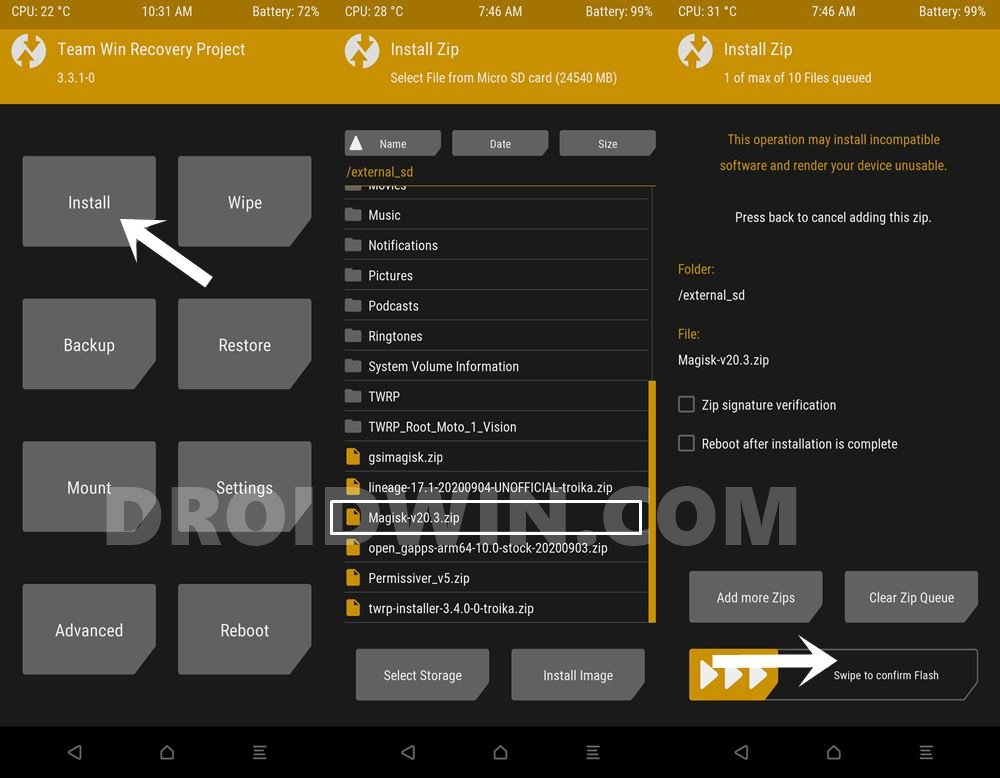
If you wish to root your device after installing LineageOS 18.1 based on Android 11, then you would have to download Magisk ZIP as well. With the latest update v22, Magisk ZIP, and Magisk Manager are now part of Magisk App. Earlier builds still have a separate Magisk Installer ZIP file, you may download any one of your choices, from here: Download Magisk All Versions. Again, rooting is also optional, you may skip it.
Install Android SDK
You will have to install the Android SDK Platform Tools on your PC. This is the official ADB and Fastboot binary provided by Google and is the only recommended one. So download it and then extract it to any convenient location on your PC. Doing so will give you the platform-tools folder, which will be used throughout this guide.
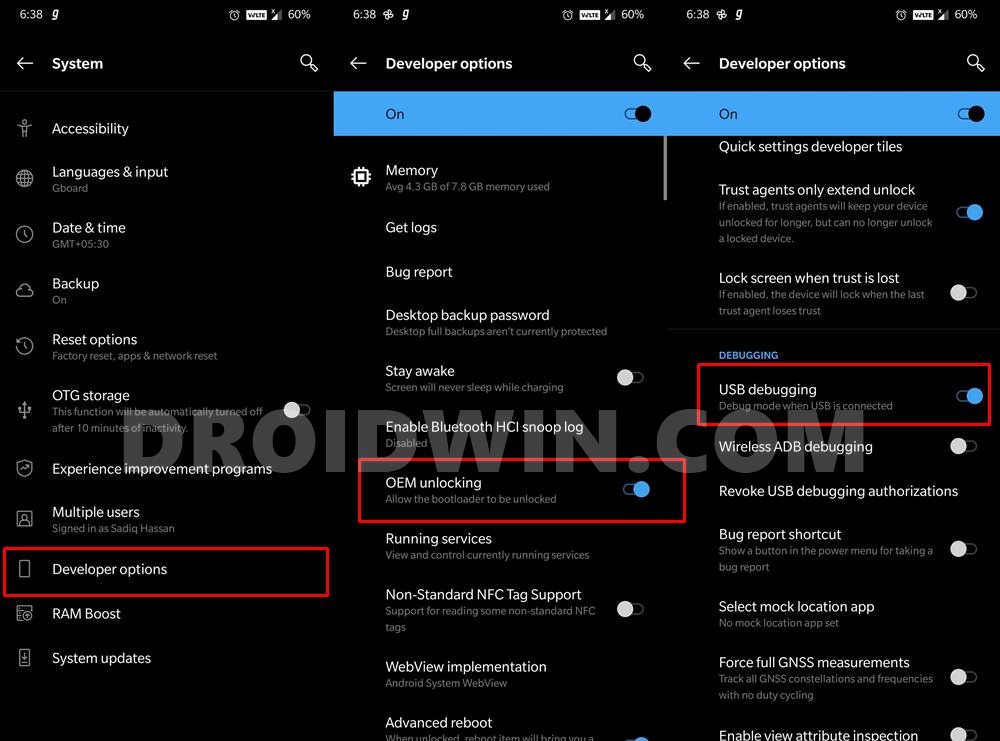
Enable USB Debugging and OEM Unlocking
Next up, you will also have to enable USB Debugging and OEM Unlocking on your device. The former will make your device recognizable by the PC in ADB mode. This will then allow you to boot your device to Fastboot Mode. On the other hand, OEM Unlocking is required to carry out the bootloader unlocking process.
So head over to Settings > About Phone > Tap on Build Number 7 times [MIUI Number in Xiaomi/Mi/Redmi/Poco] > Go back to Settings > System > Advanced > Developer Options > Enable USB Debugging and OEM Unlocking.
Unlock the Device’s Bootloader
Installing LineageOS 18.1 based on Android 11 requires you to have the bootloader unlocked, and the same is the case with LineageOS as well. But do keep in mind that doing so will wipe off all the data on your device and could make the warranty null and void. If that’s well and good, then please refer to our guide to Unlock Bootloader on Any Android Device.
Install TWRP Recovery on Android
Flashing a custom ROM requires you to have a custom recovery installed as well. So head over to our detailed tutorial on How to Install TWRP Recovery on Android. Here are the instructions in short:
If your device has a recovery partition, then directly fash TWRP there using the below command:fastboot flash recovery twrp.imgIf your device doesn’t have a recovery partition, then you would have to use the boot partition. For that, first, boot your device to TWRP viafastboot boot twrp.imgThen flash the TWRP ZIP right from the TWRP itself.If your device has a Ramdisk, then first boot your device to twrp via the following command:fastboot boot twrp.imgThen flash the TWRP.IMG file to the Ramdisk slot (from TWRP > Advanced).If your device doesn’t have Ramdisk, then you would have to patch and flash the recovery.img file via Magisk.
Boot your device to TWRP
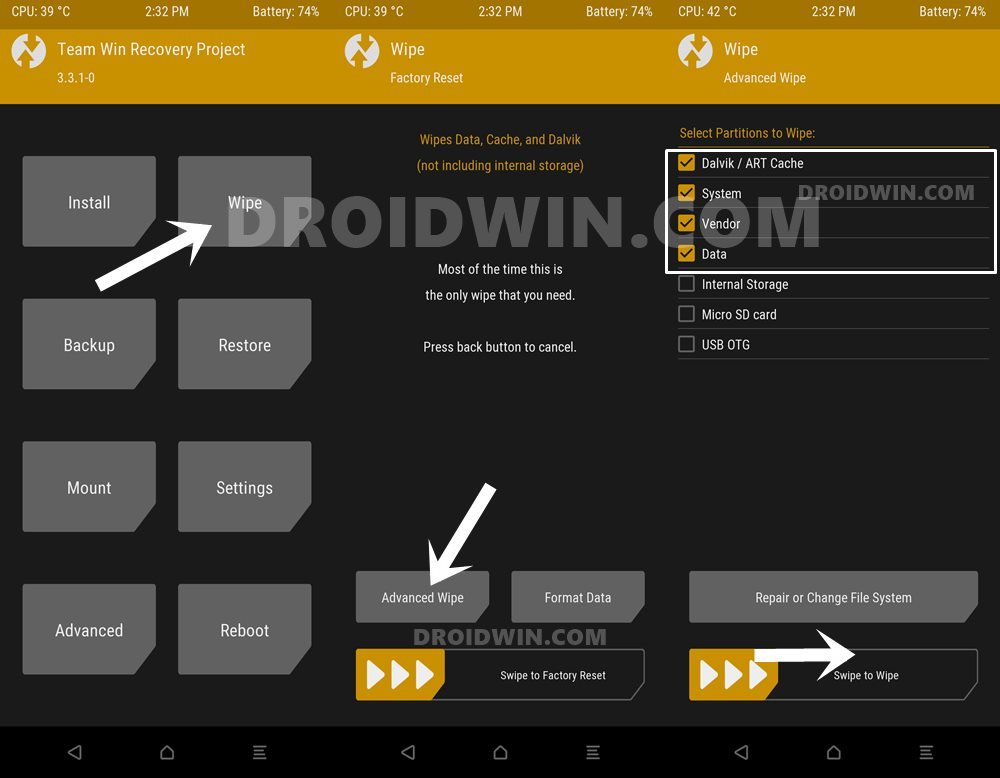
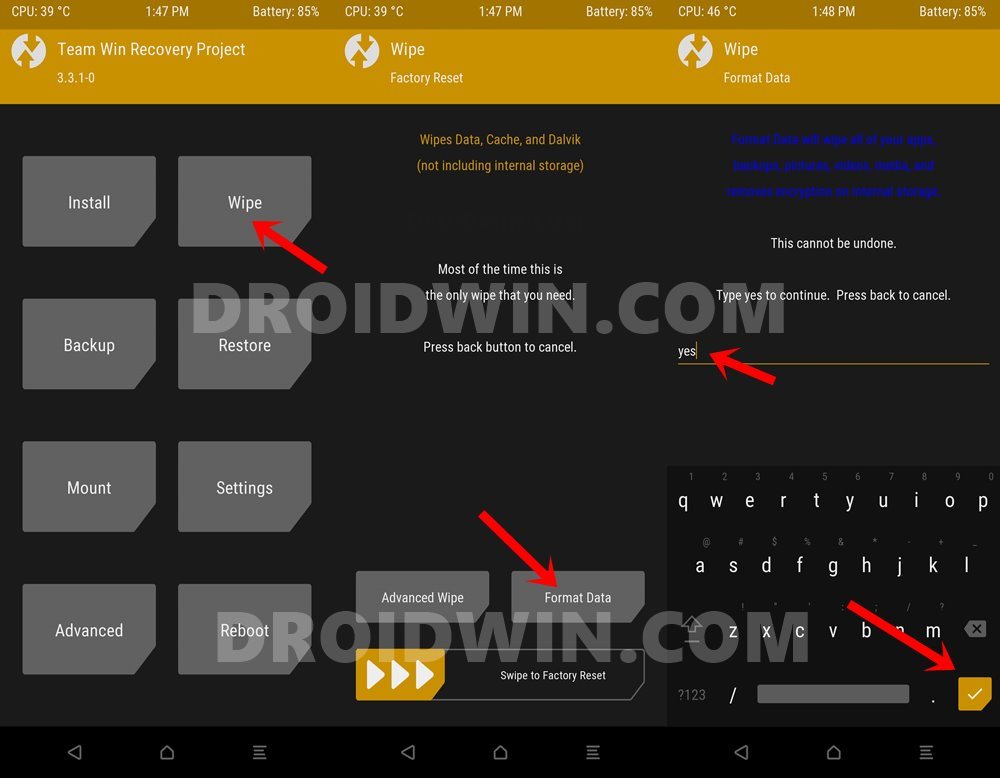
Wipe Partitions
You will now have to wipe various device partitions to make room for LineageOS 18.1 based on Android 11. We will also be wiping data partition to remove encryption. This will erase all the data from your device, so take a backup beforehand.
Transfer Files to Device
Next up, you will need to transfer the LineageOS 18.1 ZIP file to your device. Likewise, if you are planning to flash Magisk and GApps, then those files need to be transferred as well. For that, you may refer to our comprehensive guide on 3 Methods to Transfer or Install Files via TWRP Recovery. In short, you may use the Mount feature of TWRP, the ADB Sideload feature under Advanced, or use a USB OTG/Pendrive.
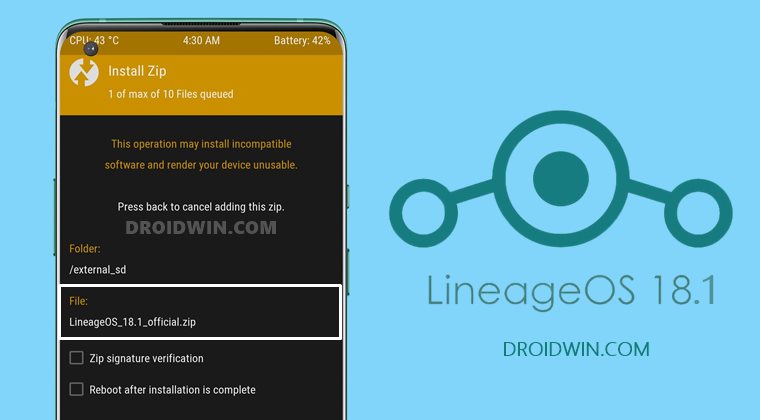
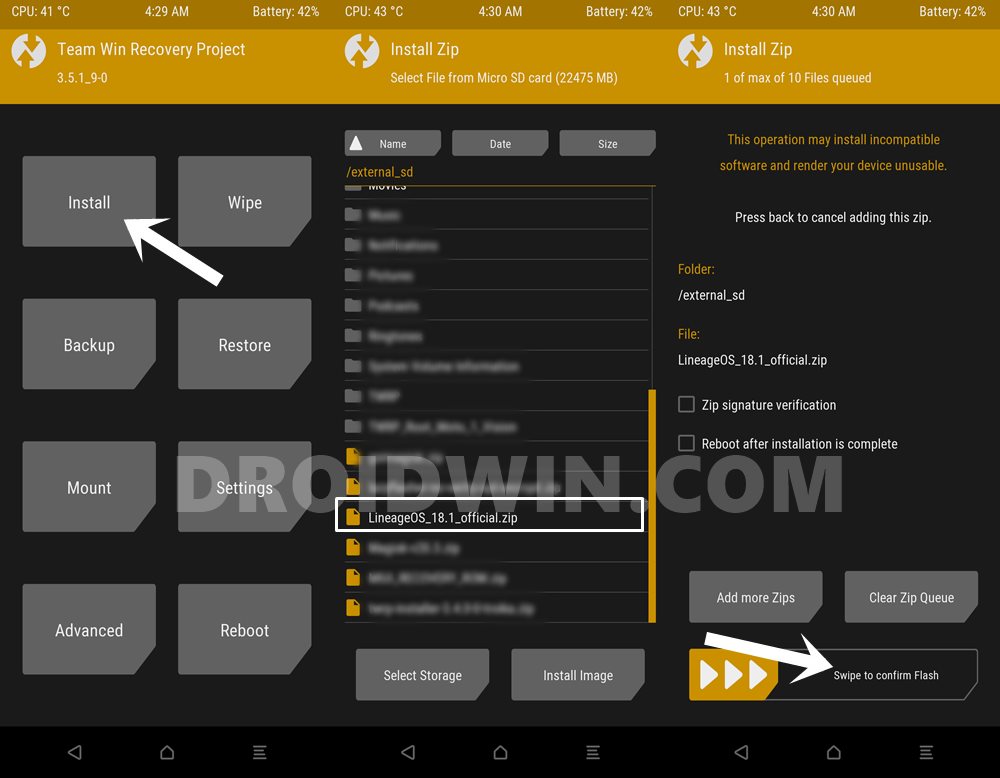
Install LineageOS 18.1 Android 11 via TWRP
So this was all from this guide on how to install the latest LineageOS 18.1 based on Android 11. If you have any queries concerning the aforementioned steps, do let us know in the comments. We will get back to you with a solution at the earliest.
About Chief Editor