In one of my articles: How to Root Android device without TWRP Recovery, the first prerequisite is that your device needs to have Ramdisk. If that is not the case, then you wouldn’t be able to patch the stock boot.img file and then flash it to the boot partition. And this is exactly what happened with one of our readers- his device didn’t come with a boot ramdisk. So he asked for an alternate route (apart from flashing the Magisk app via TWRP, since there was no custom recovery for his device). Turned out, there exists another method to root a device that doesn’t have Ramdisk. And this guide is going to focus on this set of devices only. So without further ado, here are the steps to install Magisk in the recovery partition and then root your Android device.
How to Install Magisk in Recovery and Root Android [No Ramdisk]
Well, you all might be aware of the benefits of rooting a device (installing Magisk Modules, Xposed Framework, Substratum Themes). We wouldn’t be divulging much into that. Just makes sure to take a backup of all the data on your device before proceeding with the below instructions. Droidwin and its members wouldn’t be held responsible in case of a thermonuclear war, your alarm doesn’t wake you up, or if anything happens to your device and data by performing the below steps.
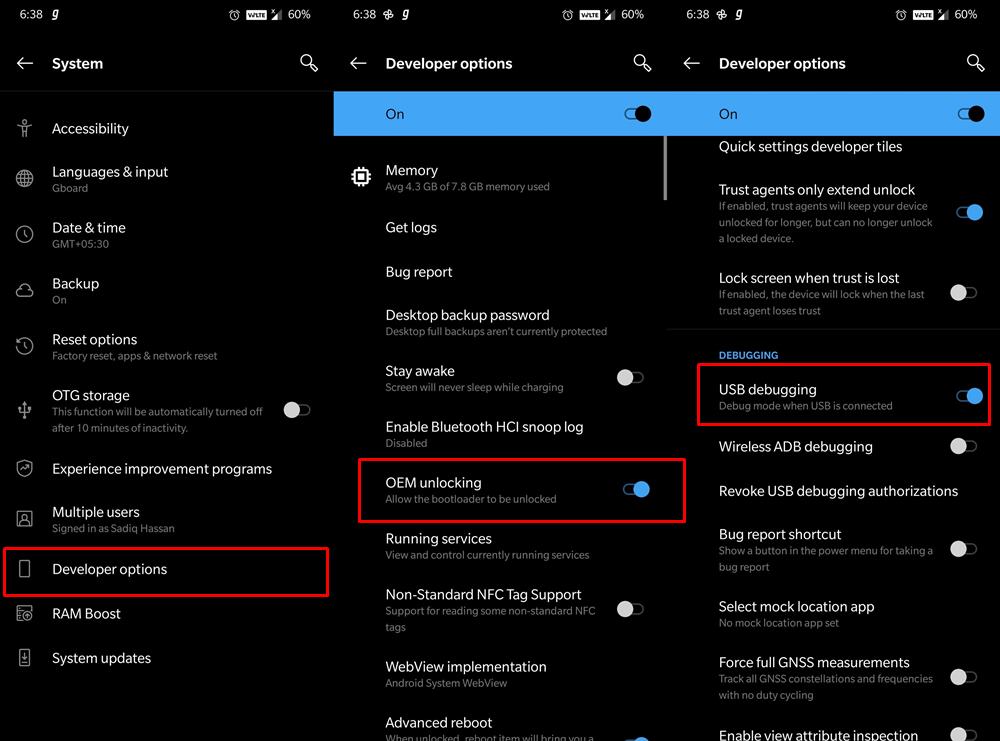
STEP 1: Enable USB Debugging and OEM Unlocking
To begin with, you will have to enable USB Debugging and OEM Unlocking on your device. The former will make your device recognizable by the PC in ADB mode. This will then allow you to boot your device to Fastboot Mode. On the other hand, OEM Unlocking is required to carry out the bootloader unlocking process.
So head over to Settings > About Phone > Tap on Build Number 7 times > Go back to Settings > System > Advanced > Developer Options > Enable USB Debugging and OEM Unlocking. [Don’t Miss: How to Enable USB Debugging on a Broken Android Device Screen? ]
STEP 2: Instal Android SDK
Next up, install the Android SDK Platform Tools on your PC. This is the official ADB and Fastboot binary provided by Google and is the only recommended one. So download it and then extract it to any convenient location on your PC. Doing so will give you the platform-tools folder, which will be used throughout this guide.
STEP 3: Unlock Bootloader
Next up, you will have to unlock the device’s bootloader. If you haven’t done so, then you may refer to our below guides. Do keep in mind that doing so will wipe off all the data on your device and might void the warranty as well. Furthermore, apps like Google Pay (due to SafetyNet getting tripped) and Netflix (due to WideVine L1 degradation to L3) might not function along the expected lines. So if that’s well and good, then here are the guides that will help you unlock the bootloader:
How to Unlock Bootloader on any Sony Xperia DeviceHow to Unlock Bootloader on any Samsung Device [New VaultKeeper Method]A Universal Guide to Unlock Bootloader on any Realme DeviceHow to Unlock Bootloader on any Motorola DeviceUnlock Bootloader on any Realme DeviceHow To Unlock Bootloader on OnePlus devices
Once you have unlocked the bootloader, move over to the next step of this guide to install Magisk in the recovery partition and then root your Android device.
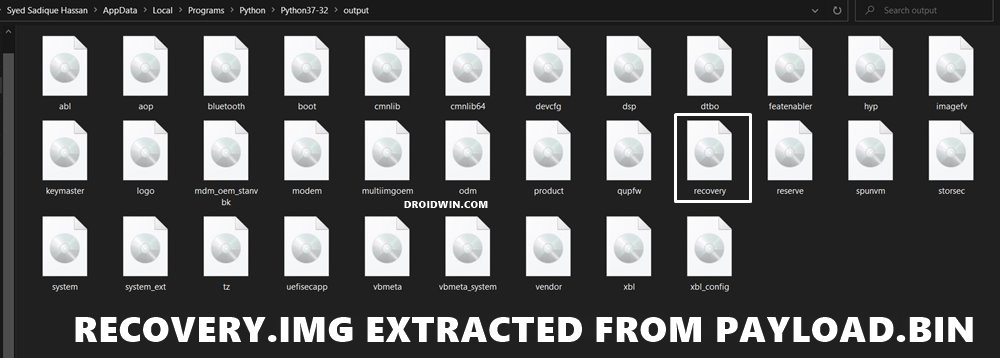
STEP 4: Extract recovery.img from Stock Firmware
Next up, download the stock firmware for your device. Most of the OEMs upload the firmware file over to their official site itself. In the case of Samsung, you could use a standalone tool such as Frija to download the firmware. Once you have downloaded the firmware, extract it to any convenient location on your PC.
In the case of Pixel, the firmware files are present as ZIP, so you could easily extract them via WinRAR. However, things aren’t so easy for other OEMs. For example, OnePlus have their partition files in payload.bin. On the other hand, Oppo and Vivo pack it under OZIP format. Likewise, devices with Spreasdtrum and Unisoc chipsets have their firmware as a PAC file. So in those cases, you may refer to our below guides.
Extract payload.bin and get the stock boot image fileHow to Extract OZIP Stock ROM (Firmware)How to Extract Spreadtrum and Unisoc PAC Firmware File
STEP 5: Install Magisk App | Check for Ramdisk
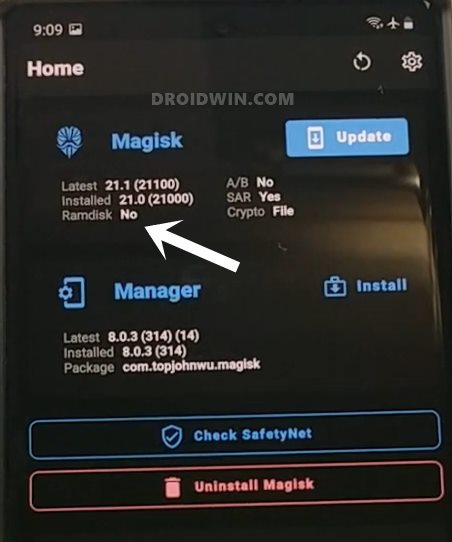
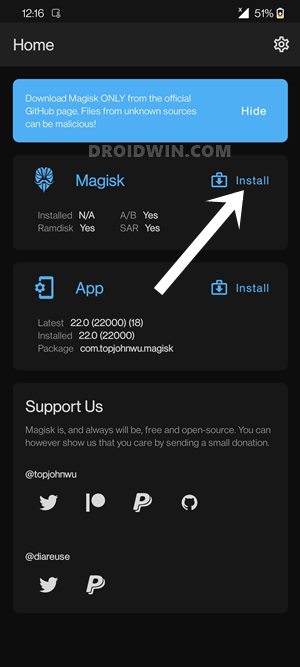
Now install the latest Magisk App v22 onto your device. [For the unaware, the latest build of Magisk has unified the Magisk Manager and Magisk Installer ZIP and they both are now part of a single package, known as the Magisk App]. Once you have installed the app, let’s verify that your device indeed doesn’t have the Ramdisk partition.
hence launch the app and have a look under the Magisk section. If Ramdisk spells out NO, then you are good to proceed ahead. [If your device has Ramdisk, then it’s better to root your device via Magisk patched boot.img]. Now that the ramdisk check is complete, let’s move over to the next step to install Magisk in the recovery partition and then root your Android device.
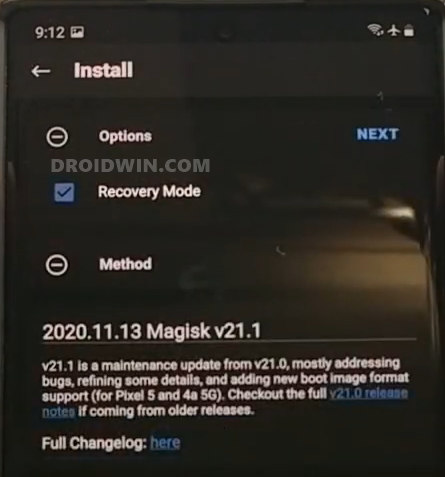
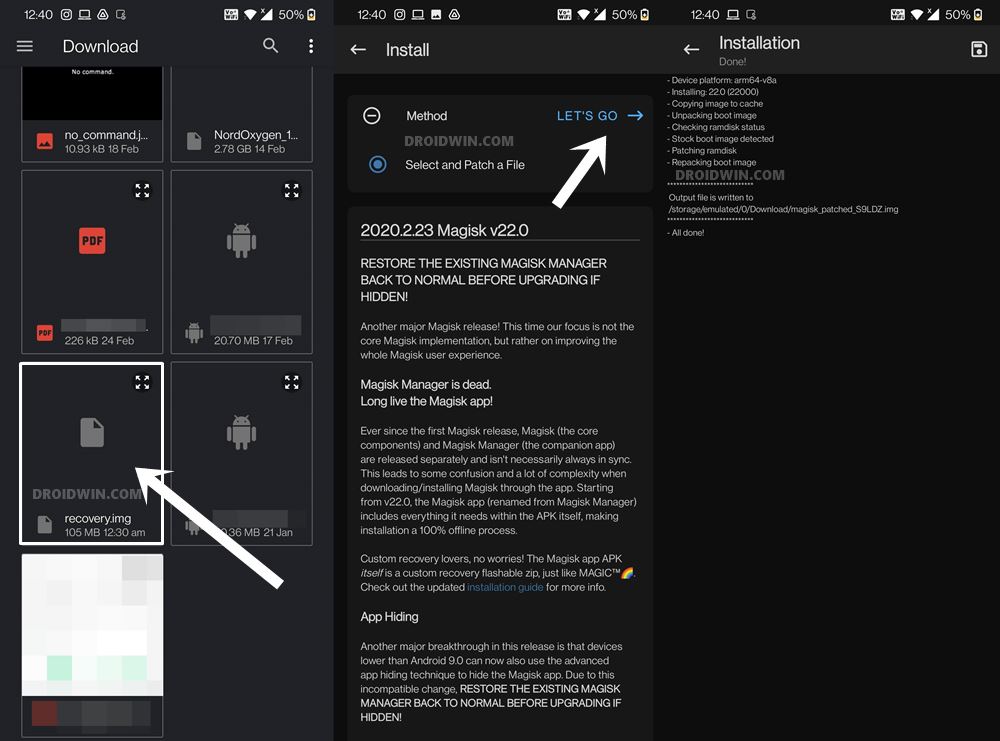
STEP 6: Patch recovery.img via Magisk
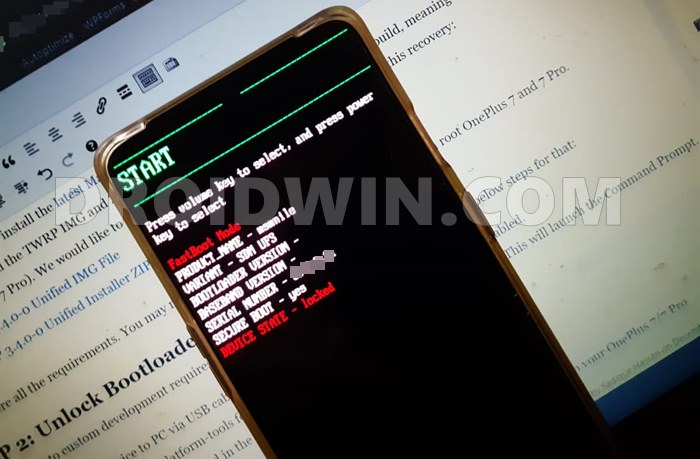
STEP 7: Boot Device to Fastboot Mode
To install this Magisk patched recovery file and then root your Android device, you will have to boot your device to Fastboot Mode. Here’s how it could be done:
STEP 8: Flash Magisk Patched recovery.img via Fastboot | Root Android
We will now flash/install this Magisk patched recovery file via Fastboot Commands to your Android device to root it. Follow along That’s it. With this, we conclude the guide on how to install Magisk in the recovery partition and then root your Android device that doesn’t have Ramdisk. If you have any queries concerning the aforementioned steps, do let us know in the comments. We will get back to you with a solution at the earliest.
How to Flash magisk_patched.tar (patched Samsung AP file) via OdinHow to Fix Error: Cannot load recovery.imgRoot Android 11 via Magisk Patched boot.img (without TWRP)
About Chief Editor